Thanksgiving centerpiece tutorial

Yesterday afternoon I put together this floral arrangement for our Thanksgiving table.

I knew I wanted to try using artichokes (first time!) and had picked up the red alstrameria while at the market.  From there I headed over to my local florist to see what she had available.  Here's what I came home with...

Alstroemeria

Lotus pods and Kangaroo Paw

Silver Brunia

Eucalyptus and feathers

I brought in some bittersweet from our yard.
I chose my antique ironstone piece for the container.

Please ignore the kitchen mess in the background...it was project central here yesterday!

The only tools & supplies I used were florist foam, shears and florist picks with wire. Oh- and a knife to cut the artichoke stems.

After soaking the foam in water, I started placing the eucalyptus branches around the perimeter of the bowl, allowing them to drape over the sides.

Since the artichokes were the largest item, I added them next.  I trimmed the stems, then inserted the florist picks into the base of the stem.


Two of the artichokes went in front, and the third I placed in the back.  I inserted them in on an angle so that the top of the artichoke was facing towards me, instead of standing straight up.

Next I put in the alstroemeria, placing them (mostly) upright and in the center of the arrangement.


The stems on the pods were very short, so I extended them by using the florist picks & wire. I used four lotus pods.

I love these silvery blue brunia...they have a wonderful texture and are a nice contrast to the other elements and colors.  And they are almost the same shade as my dining room curtains! 

I added little clippings of the kangaroo paw in front, and then a longer piece off-centered to give a little height. 

After placing both feathers off to the left side, the bittersweet went in last, tucked in around the bottom. After a little tweeking here and there...voila!  I wished I had a few more stems of the red alstroemeria to fill in some minor gaps.  But otherwise I was happy with the way it turned out.  It got put together fairly quickly...I had a 30 minute break in between piano lessons.  But with my daughter Michaela taking the photos, I was able to get it done!


Wishing you and your family a Happy Thanksgiving!  I'll be back next week with Christmas decorating ideas.

As always, feel free to leave a comment or ask questions in the comments section below.


Need help creating a home you love? Contact me about our design services.

The Spotted Cod


This past weekend I stopped in at The Spotted Cod, one of my favorite interior décor shops.  The store is located on Cape Cod in the historic seaside village of Sandwich, the oldest town on the Cape (& where we got married!).

  
The Spotted Cod takes up residence in this charming cottage which consists of four rooms, each tastefully styled and filled with high quality gifts. Lifestyle and entertaining expert Matthew Mead recalls his visit to The Spotted Cod on his blog here, and I think he sums it up perfectly!

"We entered Lee's store, which is a magical mix of unique home accessories arranged in luscious and enviable color palettes.  Lots of beautiful "one of a kind" artisan wares - many of which are made special or custom embellished just for the shop - making this experience a definite must for anyone looking for something fresh, stylish, and different. I was totally enthralled with the beach glass-colored room which is filled with items in the most incredible shades of blues and greens. Lee has a real affinity for these hues and has found a myriad of handcrafts in multiple materials that will literally make you jump for joy... I LOVED it!!  And there is so much to thrill over: pottery, glass, tabletop, linens, jewelry, home, and fashion accessories. Beautiful art, candles, and ornaments all perfectly made and displayed."


See the Sferra linen napkins peeking out from the drawer?  Eight of them (in various shades of blue & green) came home with me. Won't they look perfect in my new dining room?


While the shop has a definite coastal vibe, owner Lee Repetto is quick to point out that her items can mix seamlessly with a variety of interior design styles.  She also works with several artisans to create beautiful products and jewelry specifically for The Spotted Cod.
 
 
These fish dishes come in many delicious shades of blue and green.


They carry Elizabeth Di Cara Cream Porcelain and Cape Cod native Holly Heaslip's pottery.


I love the textured basket weave on these plates.
With the wind howling outside, I definitely considered getting a blanket or two!
 
These Sferra throws are lovely!


Love these baskets that sit under the front window!  Lee says that customers always ask about purchasing them, but they are used for storage. :-(  Otherwise I would have taken home a few!
 
 
Dear Santa, Any one of these tortoiseshell pieces would be lovely...
 
 
These delicate pieces are beautiful too!


A wooden bucket full of Dash & Albert rugs.


How cute are these lisa b. socks for little toes?!
 
 
Holiday red & green...

 
"Woof woof...jingle jingle"


The back room is all-American & nautical, full of everything you need for coastal living!
 
 
I am a firm believer in supporting small, local businesses, and The Spotted Cod is not one you want to miss! Lee is so hospitable and gracious, she makes you feel like you've stopped in to visit an old friend. She or one of her associates are always willing and happy to help you find that special something or choose a gift, and they also offer complementary gift wrapping. 
 
I'm going to be heading back to Sandwich on December 15th for the Holiday Home Tour...can't wait to get a peek at some of Sandwich's finest homes, decorated for the holidays!


As always, feel free to leave a comment or ask questions in the comments section below.


Need help creating a home you love? Contact me about our design services.

Dining Room Table Tutorial


I've had several inquiries as to how we made our table, so here's the tutorial...kind of.  I say this because in the middle of making it I got sick, so my husband took over, and the step-by-step notes I had been diligently taken fell by the wayside. But hopefully this will give you some idea. 
Here is the original table-


To make the new tabletop, we alternated 3 2x10's and 2 2x6's running down the table.  These we cut to 66".  The end cap pieces are 2x6's.  The width of the table is 41".  Since we used the existing table base,  we had to work with those measurements.  On the sides of the table, the top overhangs the base 2 3/4".  On the ends it overhangs 5 1/2".  My husband assembled the tabletop using screws, wood glue and wooden dowels.  He built the table late one night down at his shop, so I wasn't there to take notes on everything he did.  Knowing I had a few other projects for him to do, I didn't dare ask him to take the time to write everything down...got to keep the help happy! :-)  But Ana White has a great site here that offers lots of detailed plans on building tables. Once assembled,  I filled the holes, sanded, sanded, sanded, and wiped it down.  Then we went "psycho" on it...hitting it with various tools to create dents and scrapes to make it look "reclaimed".  Jim had an antique square nail that he hammered in across the boards, then pulled out, leaving the holes.
 
 
Meanwhile, I was on the experimental quest to find the perfect stain color.  While I am known for taking a paintbrush to anything and everything, this was my first attempt at using stain.  I was a little nervous, so a Saturday afternoon was spent trying different combinations out on scrap boards.
 
 
Definitely start out with a pre-stain wood conditioner. It prepares the wood for staining and allows the stain to go on evenly.  Don't skip this step!  I applied it with a brush.
 
 
I started out with Minwax Special Walnut and Weathered Oak.  I also tried Classic Gray, but that was much to gray, as you can see on the left board in the photo below.  The board on the right shows the stain before I wiped off the excess.


After trying different layering options- Special Walnut on Weathered Oak, two coats of Weathered Oak, Special Walnut on Classic Gray, this is what I came up with:  I lightly brushed on Special Walnut and let it sit for 8 minutes, then wiped off the excess with a clean cotton rag.  After allowing it to dry (follow the directions on the can for drying time), I went over it with the Weathered Oak, leaving it on for 8 minutes then wiping off the excess.  I would definitely recommend testing your stain on large boards to give you a good idea of what it will look like.
 
It was at this point I got sick, and my husband offered to stain the table.  I'm not sure if he applied the stain on thicker or left it on longer, but it came out quite a bit darker than the sample piece. 
 
 
So I tried applying a coat of Classic Gray, but that left the table looking chalky and flat.
 
 
You can also see that it's kind of splochy. So I sanded it down, but was still determined to get it lighter.  On a trip to Lowes, I found Rust-Oleum's wood stain in Driftwood (sorry- no photo).  Thinking that a brush would apply too much of the stain, I rubbed a small amount on the table with a clean rag.  While it didn't lighten the table, it did tone in down a little and gave it a faded look. It also got rid of the orange undertones.  On a side note, I wonder what the Driftwood stain would look like by itself...if you happen to try it, send me a pic! 
 
 
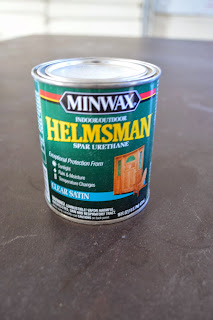
Finish off with this...Minwax Helmsman Spar Urethane in Clear Satin.
They recommend 2-3 coats, sanding between each one.
 
 
 Throughout the staining/drying process, I took the shiny white table legs, gave them a good sanding, and applied two coats of Sherwin Williams Dover White in eggshell.


I learned from this project how important it is to write everything down, making notes on every step. You think you'll remember, but you don't!  And I need to take more photos.  I thought I had plenty of  photos of my sample boards, but between brushing on the stain, keeping an eye on the time and recording what I had put on each board, I forgot to take pictures.  This being our first staining project (and first time making a table!) I think it came out pretty well.  I'm definitely up for pulling a can of stain out in the future for another project.
 
For those of you who are planning on trying something like this, I hope this helps.  If you have any other questions, leave me a comment below.  And be sure to send me a photo of your finished project! I'd love to see what you're working on!


Need help creating a home you love? Contact me about our design services.